Oranges?, nup, its an easy way to give your ‘sloppy’ chassis a quick boost to stiffen them up, and perform better. Best of all its another fifteen minute hero, it takes no time at all to do this modification. Most RTR is designed (not unreasonably) to go round ‘train set’ curves, which of necessity are pretty tight. So you’ll often find that on some loco chassis and bogie/pony trucks there is what appears to be too much lateral movement on the axles. ‘Too much’ really relates to your own requirements, if using second radii or less this modification isn’t going to be of much use to you as it will prevent the stock working well, particularly through reverse curves. Some of us who have been round the block a bit can easily see a quick fix and sometimes its easy to forget that the old dodges we learnt too long ago to mention, are still relevant to new modellers, and those who simply haven’t come across them before.
If you’re using Peco streamline medium radii curves or greater this easy modification will give you better running and in some instances make the ‘sit’ of the locomotive on the track look much better too. On Albion Yard I have some of the medium radii curves on ‘Y’ points and the asymmetric three way point. On my new ‘micro’ layout I have a similar mix including one of the Code 75 curved points. There are three RTR locomotives that I’ve done this modification to that immediately spring to mind. They are the Bachmann 45XX pony trucks, the Heljan class 14 ‘teddy bear’ drive and crank axles, and the Hornby 42xx drive axles.
If you’ve built locomotive chassis kits, at some time you’ll have encountered ‘side play’, the lateral movement of axles and wheels and how to reduce it. Often it can be done with washers of the same internal diameter as the axle. There is an element of trial and error, ideally you can fit the wheels to the chassis and body and move it through pointwork and curves to see if there are any places where wheels and coupling rods foul parts of the chassis or bodywork. With Romfords for example its easy to unscrew the wheels adjust the number washers and replace them. However if your wheelset is pre assembled like on RTR locomotives unless you take the axle assembly apart, you need another process to do this. The simple way is with the fibre washers provided by Peco.
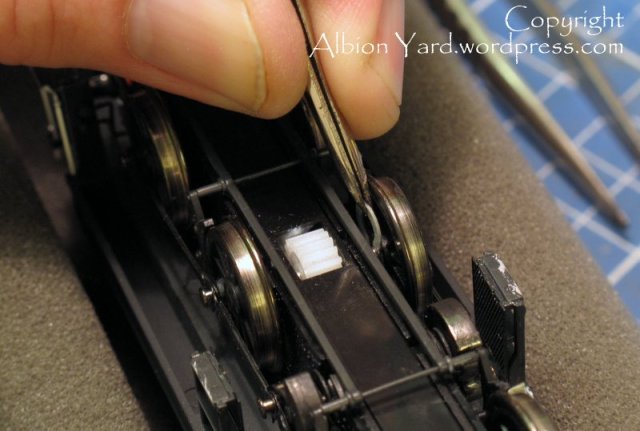
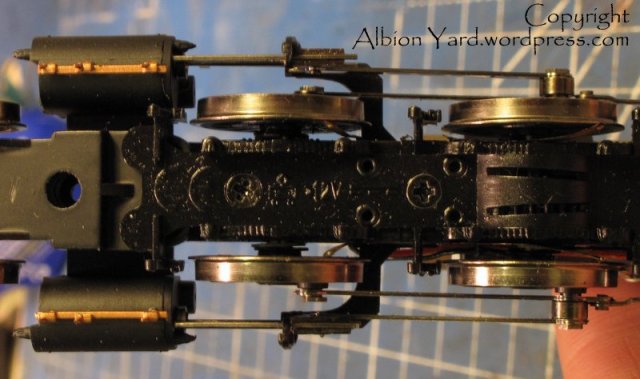
They are coded R-8 and R-9 (R8 = 1.59mm internal diameter and R9 = 3.0mm internal diameter) As they are fibre washers you can cut them with a sharp craft knife. Its also worth colouring them with a black marker pen to help disguise them when fitted, (recent production has been a sky grey color). On the 42xx (and HJ Cl14) the chassis has a very marked lateral movement across all axles. The leading axle and cross heads have the potential to collide if they are mishandled, so I decided that this axle should have minimum movement. Using R9 washers I cut them to a ‘C’.
Its important that the ends of the C look like the C on your keyboard, (see class 14 image), the ends must be close rather than a semi circle. This prevents the washer from falling off. What you’ve now made is a sort of circlip. Using tweezers these circlips can be put onto the axle, I find it easier to do this with the axle removed from the chassis, and remember to keep an equal number either side of the chassis.
It doesn’t matter if the axle diameter is a little less than the internal diameter of the washer/circlip as that allows a little play and prevents binding. If you have too many either side of the chassis they can cause friction between the wheel and chassis so be mindful of that when adding them. I then test run the chassis through the tightest of my curves, if the loco runs smoothly then its right, if not then adjust the number on each axle to suit, (this is the trial and error/gaining experience apprenticeship bit we all go through. Basically look to get a smooth and regular amount of play across the axles, difficult to describe, but you’ll know it when you see it! I’ve set mine up so that the drive axle hasn’t got much play and the leading axle much the same.
I did the same with the Class 14 too, this loco as supplied almost waddled on straight track which was noticeable with such a relatively long body. adding the washers sorted this and the loco runs much better too as there is less movement in the chassis, so the drive train works more efficiently.
Pony and bogie trucks can be modified in the same way, axle diameter is usually suitable for the R8’s, what I tend to do is change the original wheels for Alan Gibson equivalents to improve the appearance. I use an Alan Gibson back to back gauge to ensure the wheels are the correct distance apart when fitting them.


Neat ‘trick’; thanks.
Great article, thank you for sharing this, as this will help a lot
A well illustrated and easy to follow ‘step by step’ guide that even I can follow.
I’m extremely grateful, bawdsey.
Jon.
You’re welcome
Paul